list1=[1,2,3,4]
it=iter(list1)for x in it:print(x,end=' ')
1 2 3 4
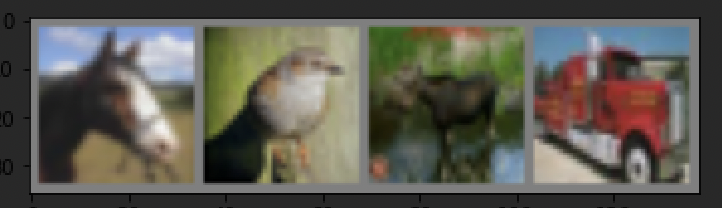
展示一些训练图像
import matplotlib.pyplot as plt
import numpy as np
# functions to show an imagedefimshow(img):
img = img /2+0.5# unnormalize
npimg = img.numpy()# PIL image转换成numpy array
plt.imshow(np.transpose(npimg,(1,2,0)))# np.transpose反转或置换数组的轴
plt.show()# get some random training images# trainloader相当于一个包含images和labels的列表,前面shuffle设置为True,因此每次运行都会结果不同
dataiter =iter(trainloader)
images, labels = dataiter.next()# show images
imshow(torchvision.utils.make_grid(images))# torchvision.utils.make_grid将若干张图像拼成一张网格# print labelsprint(' '.join(f'{classes[labels[j]]:5s}'for j inrange(batch_size)))
horse bird deer truck
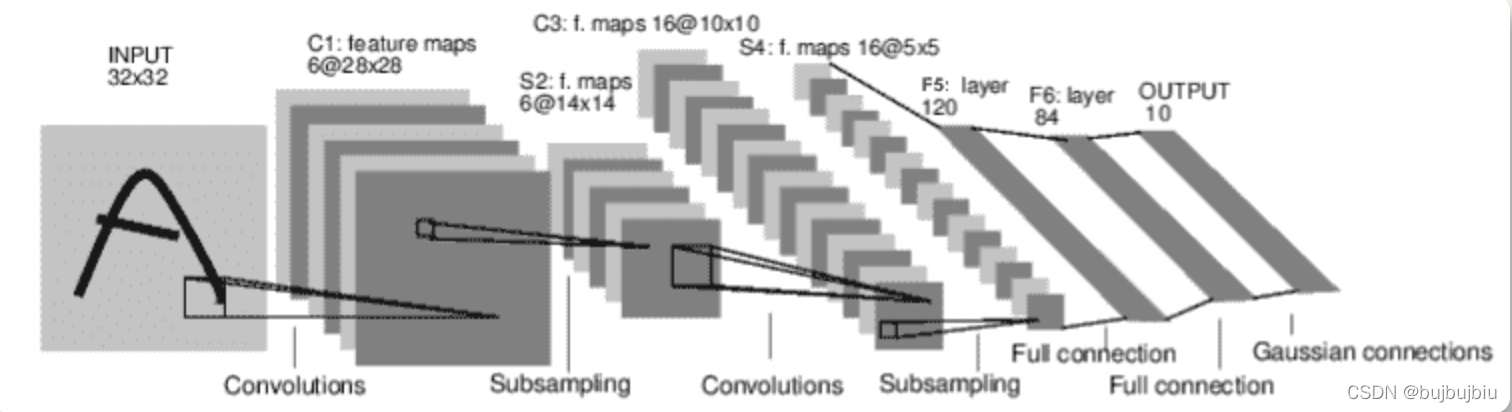
2.定义卷积神经网络
从之前部分复制神经网络代码,将图像改为3通道
nn.Conv2d:在由多个输入平面组成的输入信号上应用二维卷积
nn.Conv2d(in_channels,out_channels,kernel_size)
nn.MaxPool2d:在由几个输入平面组成的输入信号上应用一个2D max池
nn.MaxPool2d(kernel_size,stride)
nn.Linear:对输入的数据应用线性转换 y = x A T + b y=xA^T+b y=xAT+b
nn.Linear(in_features,out_features)
import torch.nn as nn
import torch.nn.functional as F
classNet(nn.Module):def__init__(self):super().__init__()
self.conv1 = nn.Conv2d(3,6,5)# 卷积计算# 3channel的32*32原始图像经过6个5*5的filters卷积计算后变成6channel的28*28图像
self.pool = nn.MaxPool2d(2,2)# 池化# 6channel的28*28图像以2*2进行pooling操作变为14*14,stride=kernel_size表示没有重复部分,28/2=14
self.conv2 = nn.Conv2d(6,16,5)# 卷积计算# 6channel的14*14图像经过16个5*5的filters卷积计算后变成16channel的10*10图像#self.pool = nn.MaxPool2d(2, 2)# 16channel的10*10图像以2*2进行pooling变为5*5,10/2=5
self.fc1 = nn.Linear(16*5*5,120)# 线性变换# 16channel的5*5平铺即16 * 5 * 5,作为FC首层的输入F5
self.fc2 = nn.Linear(120,84)# FC第二层F6
self.fc3 = nn.Linear(84,10)# FC第三层高斯层outputdefforward(self, x):
x = self.pool(F.relu(self.conv1(x)))# 卷积->激活->池化
x = self.pool(F.relu(self.conv2(x)))# 卷积->激活->池化
x = torch.flatten(x,1)# 除了batch维度均平铺
x = F.relu(self.fc1(x))
x = F.relu(self.fc2(x))
x = self.fc3(x)# 最后一层为高斯连接return x
net = Net()
totalnum =0
correctnum =0# 没有训练,因此不需要计算输出的梯度with torch.no_grad():for data in testloader:
images,labels = data
# 前向传播
outputs = net(images)
_,predicted = torch.max(outputs,1)# totalnum所有测试图像数量,correctnum预测准确图像数量
totalnum += labels.size(0)
correctnum +=(predicted==labels).sum().item()print("Accuracy of the network on the 10000 test images:%d %%"%(100*correctnum/totalnum))
Accuracy of the network on the 10000 test images:55 %
ex=[1,2,3]
ex1=[4,5,6]
m=zip(ex,ex1)print(list(m))# 出现list is not callable,表明有变量名被命名成了list,注意命名规范!
[(1, 4), (2, 5), (3, 6)]
# 字典存储每个类别预测正确的数量和总数量
correct_pred ={classname:0for classname in classes}
total_pred ={classname:0for classname in classes}# 预测并计数with torch.no_grad():for data in testloader:
images,labels = data
outputs = net(images)
_,predictions = torch.max(outputs,1)for label,prediction inzip(labels,predictions):if label == prediction:
correct_pred[classes[label]]+=1
total_pred[classes[label]]+=1for classname,correct_count in correct_pred.items():
accuracy =100*float(correct_count)/total_pred[classname]print('accuracy of %5s:%2d %%'%(classname,accuracy))
accuracy of plane:54 %
accuracy of   car:74 %
accuracy of  bird:49 %
accuracy of   cat:31 %
accuracy of  deer:53 %
accuracy of   dog:47 %
accuracy of  frog:60 %
accuracy of horse:58 %
accuracy of  ship:69 %
accuracy of truck:54 %